Before we get started today, it might be a good idea to take a refresher and read yesterday’s post about how to use your Photoshop Elements software to transform a humdrum photo into a snazzy silhouette. Today I’m going to show you how to kick things up a notch by cutting out the same silhouettes you created with your Cricut!
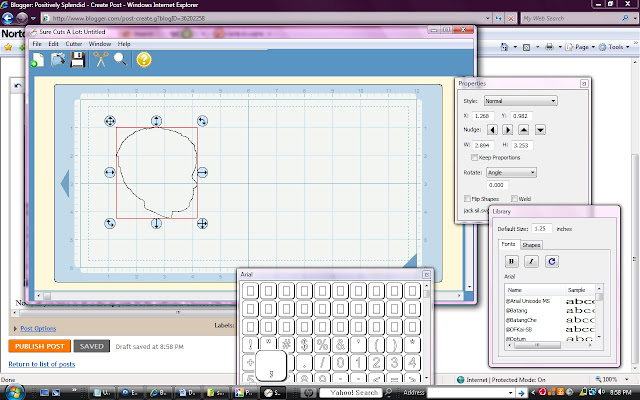
I’ve mentioned the Sure Cuts A Lot software quite a few times before (see the post here for another great project idea using your bug). When I purchased the software, I was impressed with one of the selling points being the fact that by converting any image file to a scalable vector graphic (SVG) format, you can then use your Cricut and SCAL software to cut it out. The sky is really the limit to what you can do here! Until I created my first round of silhouettes, I hadn’t ever had a project that made me want to figure the whole conversion process out, but I couldn’t shake the thought of how incredibly handy (and downright cool) it would be to have the ability to cut out my childrens’ silhouettes with my Cricut. Think of the possibilities! So, I did some digging and found out exactly how it’s done.
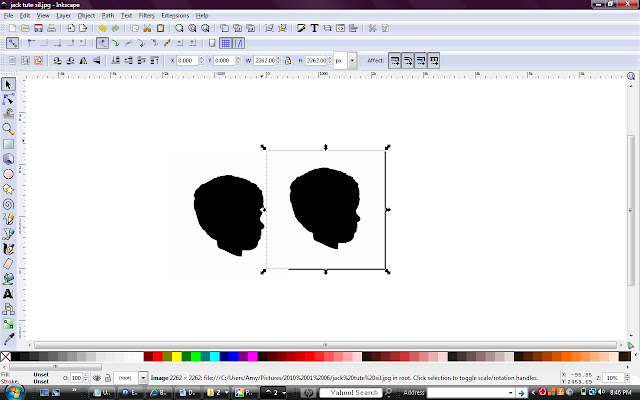
In Inkscape, open your saved JPEG silhouette image. Click on your image to select it (arrows will appear around the perimeter of your photo).
To create the tabletop photo vignette that I posted here and shared in yesterday’s post, all that was required was cutting out the silhouettes in my desired size to fit in my frame (which I purchased at Walmart for just $5). I then cut a piece of white cardstock to fit in the frame and adhered my silhouettes to it so each would be centered in its respective “nook.” I took some scrapbooking stickers I had on hand to spell out each child’s initials, and I used a heart sticker and smaller stickers indicating the year to fill in the fourth slot. After everything was adhered to the cardstock, I slipped it into the frame, and I was all set!
I had planned today to share my step-by-step for creating some darling silhouette wall plaques, but I think we all might be on systems overload after this photo- and information-laden post! Let’s pick up where we left off later this week, shall we? 🙂
Having grown up in a home brimming with sewing notions and paintbrushes, Amy has a deep love for all things creative. On any given day, you’ll find her knee-deep in her latest creative endeavor, with projects ranging from sewing and crafts to home decor and kid-friendly ideas. Amy believes that everyone, regardless of skill level or experience, possesses the ability to create something beautiful, and Positively Splendid was born of her passion for helping others harness their innate creative potential.


That seems pretty easy! One more reason for me to invest in SCAL:)
Great! I am trying to figure out if I want to get the program you have or Make the Cut. What fun project with so many potential uses.
Can you tell me how I could go about this if I don’t have photoshop. I do have SCAL and I’ve downloaded Inkscape.
Thanks
I would like to exchange links with your site http://www.positivelysplendid.com
Is this possible?
Thanks so much, this was so helpful!
This was very helpful! Thank you.
Thank you sooooo much for this tutorial. I needed a Dallas Cowboy star for a project I was working on and all the files I found were a rounded star and I needed to create one asap. LOL This worked perfect!
Can someone please tell me why some SVGs get messed up when you open them in SCAL even though they’re perfect in Inkscape? Is it because I have version 1 of SCAL?
Im a day late and a dollar short. SCAL is not avail for cricut that I can find. Anyone have a source I can use for my Cricut Expression?
This tutorial is awesome! Thank you so much. I have the Make The Cut Software and I have searched and searched for a tutorial on Inkscape that was easy, and simple to understand. I absolutely love your tutorial. I am so GLAD that I came across it!
Hi, I’ve used this tutorial, but when I open the file into Silhouette Design Studio, I get no cut lines. What am I doing wrong?
My email is [email protected]
Ursula, I am not really familiar with how Design Studio works when it comes to SVG files. Is there a forum specifically for Silhouette questions you could consult with? I am sorry not to be of any help!
I don’t get a pop up when I trace the bitmap. Everything is the same up to that point. Any suggestions?
Nevermind. The popup was so far at the bottom that I didn’t see it…
All this time I thought my sister to be a rocket scientist for knowing how to do this. I had no idea it was so simple!! I told her your tutorial must be exceptionally well written to be so easy to follow! 😉 Thank you so much!
Correction: [email protected]
Amy, I never respond to blogs and information I find, but your tutorial is great. I had to let you know. I have had SCAL for a couple of years and had always just used other peoples free svgs, but I was looking for a logo and, even though I found pictures online, I couldn’t find an svg so I decided to try to make my own. This was so simple. Thank you so much for the instructions.
I am so glad to hear you found this helpful, Charlotte! Thanks so much for stopping by to comment.