Start by choosing your fabric and length for your table runner. This fabric was leftover from a set of curtains I recently made. Not only do I love the subtle weave pattern on it, but at 56″ wide, it was the perfect width to do “mini” runners for across the table (rather than one long runner down the center).
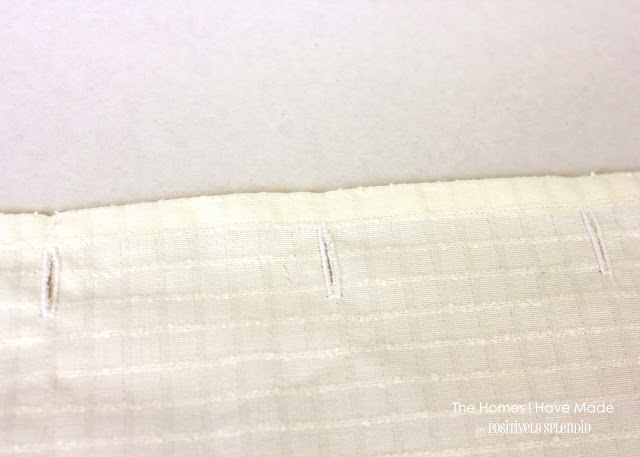
I placed my button holes against the hem, and they extend about an inch in toward the center of the runner. Below, you can see all my button hole markings down both sides of my runner.
Now is the fun part! Take a stretch of ribbon that is about 4″ longer than your table runner. Attach a safety pin to one side and weave the ribbon in and out of your button holes, keeping the ribbon flat (and un-twisted) as you move down the runner.
Be sure to check out Megan’s PS Profile Page, and connect with her on her blog, Facebook and Pinterest!
Having grown up in a home brimming with sewing notions and paintbrushes, Amy has a deep love for all things creative. On any given day, you’ll find her knee-deep in her latest creative endeavor, with projects ranging from sewing and crafts to home decor and kid-friendly ideas. Amy believes that everyone, regardless of skill level or experience, possesses the ability to create something beautiful, and Positively Splendid was born of her passion for helping others harness their innate creative potential.


What a cute idea! I love that you can switch out the ribbon for each season or holiday.
Great idea! This turned out gorgeous! Thanks so much for the easy step by step instructions for those of use who are sewing challenged! 😉
I love this! I think ribbon is one of the best ways to add personality and color to anything. Your tutorial and pictures are wonderful too!
Simple yet so lovely! I love the color of the ribbon – just perfect for spring! Thanks for sharing!
So pretty, Megan. It’s so light and fresh. I love the green ribbon – it’s perfect for spring!