Every Tuesday and Thursday throughout November and December, I’ve invited some of my favorite friends over to share their best ideas to make this holiday season truly spectacular for the third annual Swell Noel series. The ever-talented Stef from Girl. Inspired. is here today to share a gorgeous, rustic-chic centerpiece idea with us. I just love the elegant simplicity of this tealight log centerpiece!
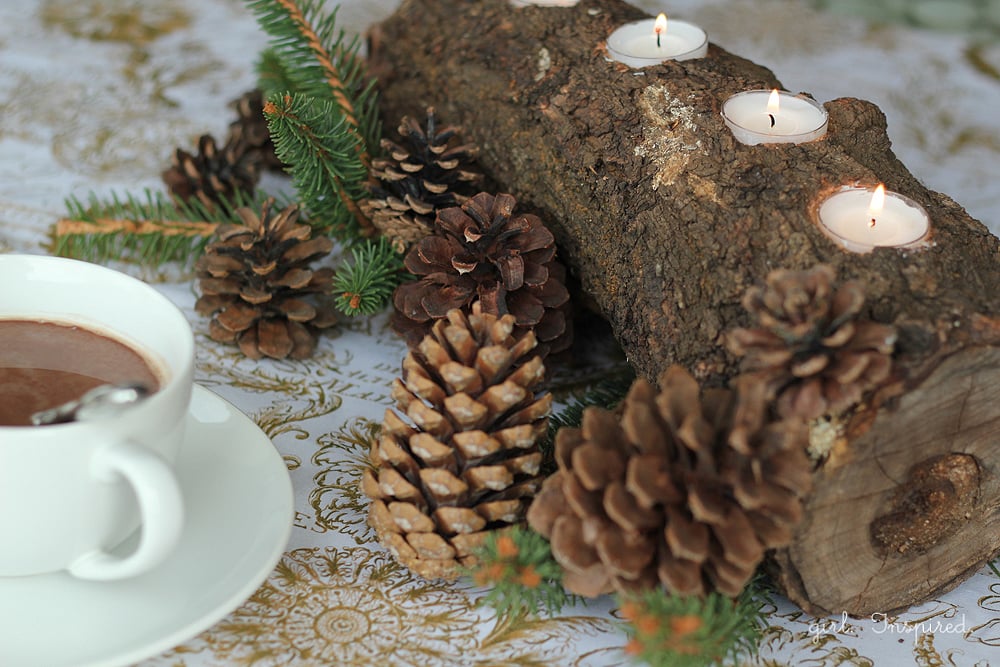
Hi there Positively Splendid readers! I’m so happy to be part of the Swell Noel event today! I’m Stef, from Girl. Inspired. and today I’m going to show you how to easily transform an ordinary log into a candlelight display piece for your holiday table or your fireplace! This project requires just a few supplies that you can probably find around your house and a little bit of elbow grease. Are you ready to make this Tealight Log?
You will need:
1 Oak Firelog
Tealight Candles
1 1/2″ Hole Saw Drill Bit and Drill
Chisel and Mallet
protective eyewear
Evergreen branches and pinecones (optional)
To make the Tealight Log, we are going to use the hole saw drill bit to make circular holes in which the tealights will set. Place the log on a solid, flat surface and roll it until you find the resting side that is the most stable. Across the top of the log, set out the tealights and space evenly – I used four tealights, spaced about 1 1/2″ apart on a 14″ log.
Once you have an idea of where you want to place the candles, it’s time to drill the holes! Fit your drill with the 1 1/2″ hole saw and be sure to put on protective eyewear!
Hold the log steady with one hand and begin drilling your first hole.
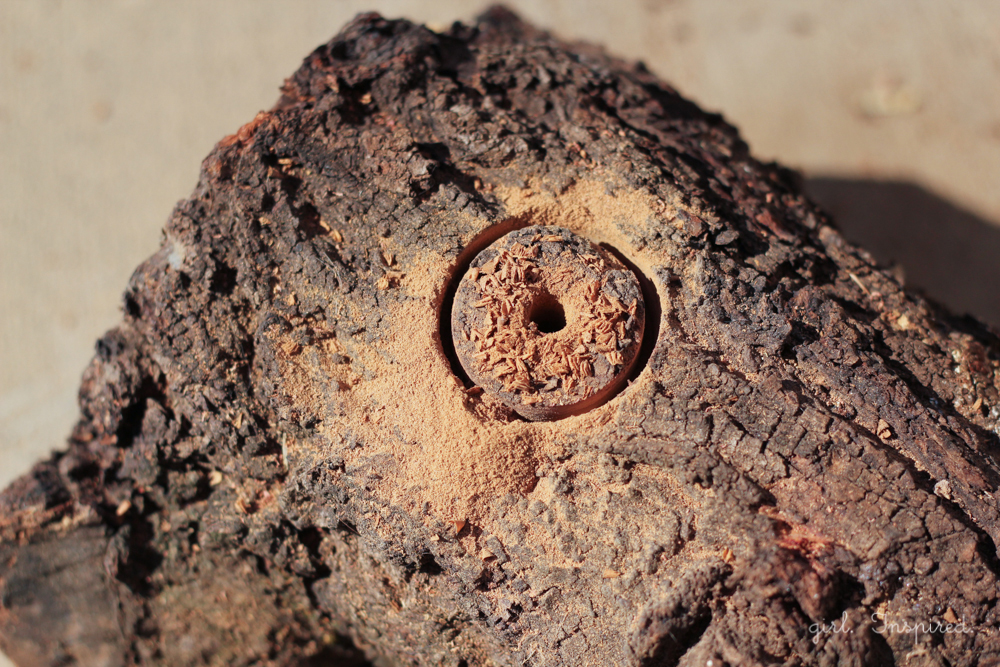
Drill until your hole is the same depth as the tealight (this may need to be done in phases; see note below).
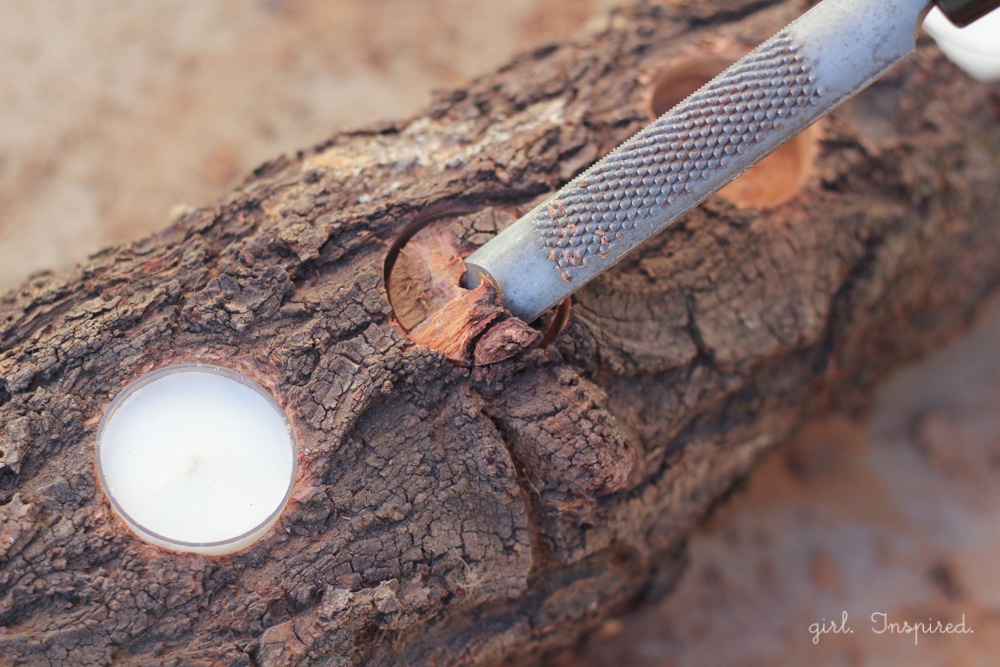
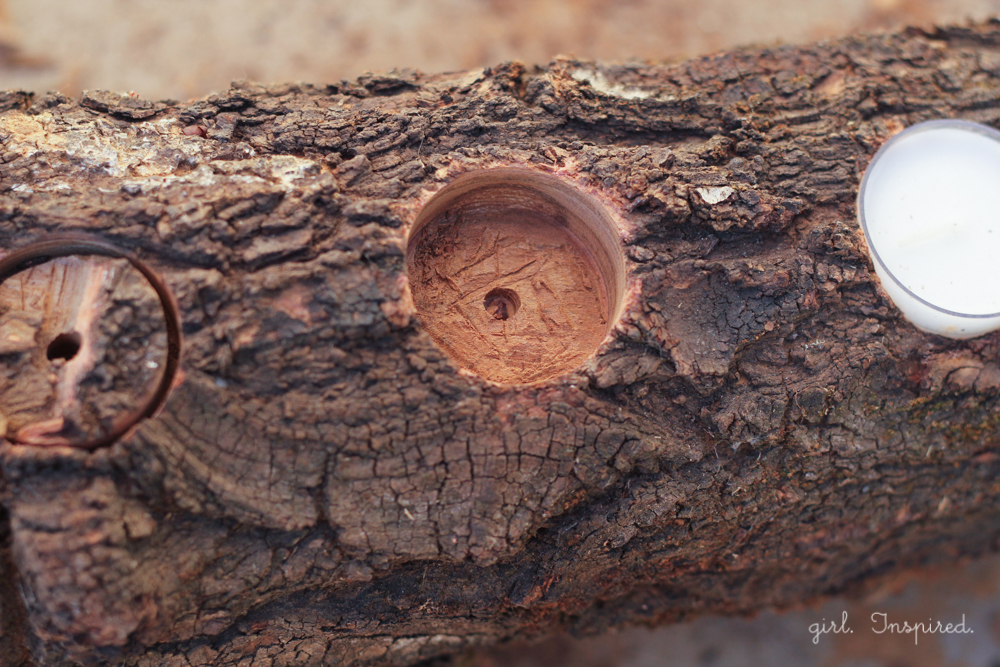
Next, remove the extra wood in the center of the drilled circle. To do this, use a mallet to pound a chisel into the center at an angle and chip out the wood. Continue chiseling until the hole is level across the bottom. I expected that this step would be painstaking, but it was actually quite easy and didn’t take long at all.
You may need to drill a little more and then chisel again to get the hole to the correct depth. Repeat for all desired tealight holes.
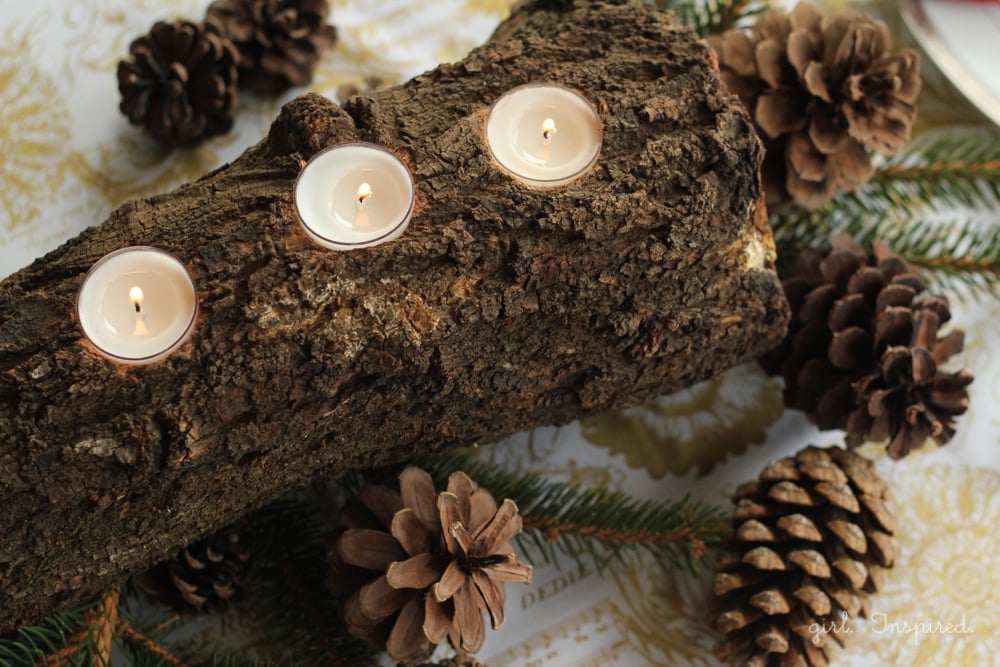
Pop in the tealights (they should be snug) and you’re done! I placed my log with some short evergreen branches and a smattering of pinecones on my kitchen table. The candlelight is so pretty and I love the cozy rustic feel that the log affords. I should note that the candles should only be lit when an adult is present – don’t leave this display unsupervised. It would also be really lovely in a fireplace!
Christmas is my favorite holiday and I just love seeing all of the craft inspiration here! I’d love for you to stop by Girl. Inspired. Here are few of the projects I’ve been working on:

1. Holiday Photo Tips 2. Cloth Napkin Sewing Tutorial and Acorn Napkin Rings 3. Hot Cocoa Gift Jars Free Printable 4. Two-Ingredient Pumpkin Donuts
Thanks for having me here today, Amy, and thank YOU for reading!
***
Stef is one of my most precious blogging friends. I do hope you’ll stop by her gorgeous blog to pay her a visit!
Connect with Stef: Blog / Facebook / Instagram / Pinterest / Twitter
Having grown up in a home brimming with sewing notions and paintbrushes, Amy has a deep love for all things creative. On any given day, you’ll find her knee-deep in her latest creative endeavor, with projects ranging from sewing and crafts to home decor and kid-friendly ideas. Amy believes that everyone, regardless of skill level or experience, possesses the ability to create something beautiful, and Positively Splendid was born of her passion for helping others harness their innate creative potential.




Eureka!!!!
I have been trying to think of a way to have a white birch yule log that was a bit different than the traditional and you hit the nail on the head with this project. Thanks I will be working on this over the weekend and link back to this post when I publish on my blog.
Happy Thanksgiving
Amazing work, Stef!! Every single thing you post looks like it is straight out of a magazine. Such a great tutorial!!
Great project!!! It turned out so beautiful!! Love it!!