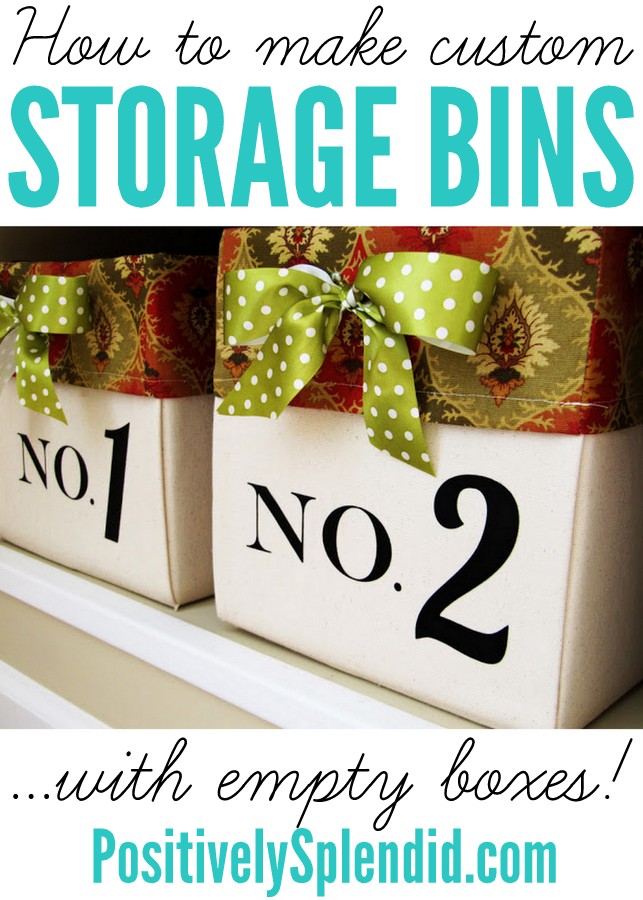
What began as three diaper boxes became in just a couple of hours a chic collection of lined, numbered canvas bins. The custom look of these really belies the fact that they all started off life as a vessel for holding diapers, don’t you think? My head is already dancing with ideas for all of the other rooms in my house that will get a set of similar containers!

step 2 / Lay your cut piece of fabric on a flat surface, and place your box on top of it, so it is precisely centered on the fabric. (Make sure the long sides of your box is aligned with the long sides of your fabric piece.) Use your measuring tape and disappearing ink marker to mark a line out 2 inches out from one of the corners of your box, as shown. Now, mark a line out from the bottom of the mark you just made that is perpendicular to the raw outer edge of your canvas piece, as shown. Repeat with the remaining three corners of your box. Cut along all of these lines, so that you are left with a cross-shaped canvas piece, making sure to cut along the angled corner lines, as well.

step 3 / Apply a thin, even coat of spray adhesive to one of the long sides of your box. With your box precisely centered on your cut piece of canvas, fold the corresponding canvas flap up and over the box, pulling the fabric to ensure it is snug and your bottom edge is crisp. Use your hand to smooth out any bubbles. Repeat with the other long side.

step 4 / Working on one of the short sides of your box, apply an even line of glue to one of the outer edges, and fold over the corresponding flap snugly to adhere it to your box. Make sure to pull enough so your edges are crisp! Repeat this step for the remaining flaps on the short sides of your box.

step 5 / Apply an even line of glue on either side of your remaining short flap, as shown. Fold in and adhere the outer edges of the flap so that the creases formed are in perfect alignment with the outer edge of your box, as depicted below. (Once these outer edges are folded in and adhered, your flap should be precisely the same size and shape as the short end of your box.) Apply glue to the top and sides of one of the short ends of your box, and then snugly fold the flap of fabric up and over this side, making sure everything is smooth and even, and that you have a nice, crisp corner at the bottom edge. Repeat with the other flap on the opposite short side of your box.

If at this point the edges of your fabric aren’t exactly aligned with the top rim of your box, don’t worry! The liners to make will cover up this part of the box. If the canvas sticks up taller than the rim of your box, though, I do recommend that you trim away the excess so that you liner will fit your box properly.
step 6 / Use the basket liner tutorial of your choice to make liners for your bins. There are so many great tutorials out there! For this set of bins, I used this tutorial from Make It and Love It, with the following modifications: instead of creating a casing as the tutorial details, I simply hemmed the edge of the liner, and then I added two button holes to the center front of each liner to thread a piece of coordinating ribbon through.
step 7 (optional) / Use your die cutting machine to cut coordinating numbers and/or letters from your vinyl to label the front of your bins. I labeled mine Nos. 1 through 3, but another great option would be to make a label to indicate the contents of each bin (movies, games, etc.).
All finished!


Helpful hints and tips
Here is another terrific basket liner tutorial found at Sew 4 Home I might try on my next set. Peruse the blogosphere to find a basket liner tutorial or pattern that suits your tastes!
The fonts I used for the lettering on my bins are Engravers and Lobster.
No die cutting machine, but still wanting to label your bins? Stencils and acrylic paint are another great option!
***
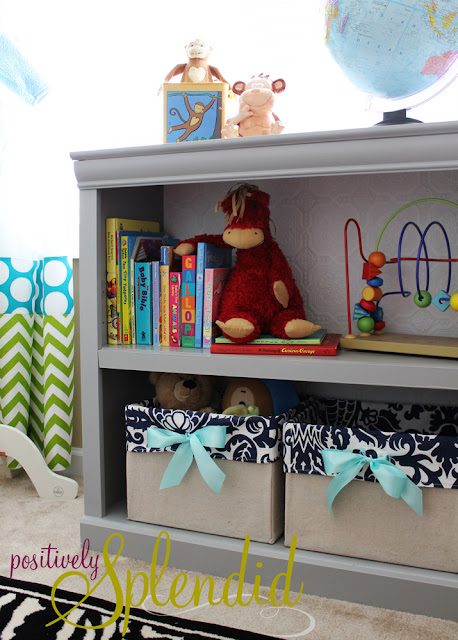
Wanting to see more examples of these bins? Check out the set I made for my son’s nursery!
Please let me know if you have any questions at all!

Having grown up in a home brimming with sewing notions and paintbrushes, Amy has a deep love for all things creative. On any given day, you’ll find her knee-deep in her latest creative endeavor, with projects ranging from sewing and crafts to home decor and kid-friendly ideas. Amy believes that everyone, regardless of skill level or experience, possesses the ability to create something beautiful, and Positively Splendid was born of her passion for helping others harness their innate creative potential.
Wow, I absolutely LOVE this idea! Thank you so much for sharing this (and all of your other amazing tutorials)!!!
These are fantastic! I’m about to make a TON of these! Thank you for the great tutorial. Can you tell me about how much canvas it takes to cover one box? Thanks!!!
Hi, Amy! So glad you like this tutorial! The amount of fabric needed will vary depending upon the size of the box, but I would say it is a good bet to need between 1/2 to 1 yard of home dec fabric per box. I highly recommend using drop cloths for a more cost-effective alternative!
They look lovely! Why did you use glue and not the spray adhesive for all the sides?
OMG~! Unbelievably cute. Great idea. You are very clever! Thanks for sharing.
WOW!!!Brilliant! There is no way anyone would ever be able to tell that those are diaper boxes! Great job!
NO WAY!!!! These are AMAZING! Another project for my never ending list.
What a great reuse of diaper boxes! I use diaper boxes to store some of my boys shoes, but I don’t fancy them up because they are hiding under the baby bed:)
These are really fantastic well done i love them x x tina http://scratchycatcrafter.blogspot.com
What a perfect idea! I have tons of those lying around!
These are adorable! I Love crafty stuff like this.
Great Job!
DaNita
I love this, thank you for sharing such a fab idea, at last some thing to do with these boxes!
Those are absolutely, positively…FAN-FLIPPIN’-TASTIC!!!! 🙂
This is absolutely genius!!! Thanks so much for sharing!
Ok- so I’ve been a silent follower but I have to come out of my shell and seriously give you major props for this!!! BRILLIANT!
I called my husband over to check these out because we’re in desperate need for storage and oddly enough we’ve just been using diaper boxes as they are… BOOO to our lack of creativity but YAY to yours! I love it and I’m so going to try to craft a few of these out!
What a fantastic idea! They look perfect!
<3
Risa
Amazing Amy!!! I love it!!!
I shared it on my TT&J facebook page 🙂 I hope you are having a great day!!
xoox
Jen
This rocks!
Debbie@
All I need now are the diaper boxes! I have been organizing this week, and I need some cute containers! Thanks for thinking outside the (diaper) box!! Love it!!
Debbie
I’ve been waiting for this tutorial! Love, love, LOVE this project! I am so making some of these for the nursery and my little guys new big boy room. Thanks, Amy!
I’m already sad that I have no more babies or diapers….now I’m even sadder, I need these boxes!!!!
BRILLIANT!!! We have the same Target diaper boxes. I am going to grab them out of the recycle pile in the garage and store them for future storage boxes (when I get a chance to pretty them up!) Thank!!
Brandy
Gluesticks
http://www.brandyscrafts.blogspot.com
unbelievably awesome!! who would have thought that you started out with a diaper box! thanks for sharing-these are perfect!
What an amazing project….as the mother of 5 youngest being 11 months and still in diapers! I can so appreciate this…I have tons of diaper boxes because they really are great for storing things. Thanks so much for sharing and inspiring.
OMG….I am about to start potty training my daughter and may put it off so I can stock up on diaper boxes!
This is a great idea! They look SO nice. I found this from Sumo’s Sweet Stuff. I would love for you to share it with my readers. I am working on offices this month and this would work great for an office bin.
I’m going to give you the link since I’m not on blogger and it’s a pain to try and get to my link from google.
Hope to see you there.
http://www.organizewithsandy.com/2011/02/07/organizing-mission-monday-mission-office-week-8/
Absolutely brilliant! And just as I am thru with diapers too….lol.
Yea! I’m so glad you hared the how-to because I recently set aside several boxes for this express purpose and was just going to wing it. But now I don’t have to! Thanks!
LOVE THIS, deffinatly making some ASAP! Thank you if I post I will link back to you, Thanks!
http://www.momsofalltrades.blogspot.com
Amy, I cannot believe that you upcycled diaper boxes into something so clever and cute!!! I am in love! Thanks for this tutorial… I can see me making this in the future!!
These turned out SOO cute!!
these turned out fabulous!!!
holy cow. what a way to UPcycle!!!
beautiful work.
kelle
Fantastic! I’m am going to try this tomorrow.
genius. can’t wait to try this!!
I’ve been doing something similar with the bulk wipes boxes but yours look much prettier, might be making some changes to mine! domesticdeadline.blogspot.com
OMG…this is GENIUS! Thank you thank you thank you for posting this tutorial. Now, crossing my fingers the the hubs hasn’t actually taken all those boxes to the recycling center already…
Sew cute! I made one a while ago using scrapbook paper to cover them. But, it was a small recycling bin. I like your canvas ones much better!
Brittany
http://www.prettyhandygirl.com
these bins drew me over to your blog. there great and i am your newest follower..
lauren
Wow, those are super cute! Great recycling project.
This is so cool! I buy those exact brand of diapers too! Now I know what to do with the boxes.
Hop on over to the Party! Would love for you to link-up @
http://thetreasurista.blogspot.com/p/treasuristas-thursday-treasures-come.html
The Treasurista
Finding and Creating FUN things…
Okay, AMAZING Amy! Seriously! I’ll be featuring these on my blog in a couple of weeks! You are awesome!
Sumo 🙂
You are amazing! I just LOVE this idea! I will be sharing your post on my blog next Tuesday – giving you ALL the credit, of course! This idea just made me your newest follower! I can’t wait to take a look around your blog!
Jackie ~ http://itscrazycheap.blogspot.com/
Love this! I too have an ever growing stash of diaper boxes. I knew they would be useful for something! 🙂
I just made the full sized storage bed from Knock Off Wood and have been searching for baskets or something to go in the cubbies. This just saved me tons of $$. These are perfect. Now to find the diaper boxes. Hope my friends didn’t see this tutorial. Those boxes might become a hot item! LOL
Thanks for sharing! I’ve posted a link and yours has made this week’s top 10 most popular, and will be featured in this week’s newsletter! Great job! (ps. I want some of these.)
This is absolutely brilliant!! I love the look of fabric bins, but have never been able to bring myself to pay that much money for one. With two still in diapers, I have at least 3 diaper boxes and 1 wipes box come through my house every month. Thank you so much for sharing!
These are really beautiful. Nice job!
I love them! I want to go get me some canvas now!!
Unbelievable Amy! I just saw this at Ucreate and Wow!!!! This was brilliant. and I love the lining fabric with the canvas. Just beautiful. Now to find someone with diaper boxes. I’m way past that age bracket.
I’m looking forward to following you. Hope you’ll stop in and visit me at http://cottonpickincute.blogspot.com sometime.
Hugs…Tracy 🙂
Way to go!!! What an amazing inspiring idea!!!
Beautiful containers and great tutorial!
now I’m thinking of all the other useless boxes I have around my house and where they might best fit once transformed into these cuties! can’t wait to make one or a zillion of these!
Oh my!!!! Those are beautiful you are soooo talented, I’m not so sure they would turn out that wonderful for me. 🙂
Not too often do I find myself expressing my thoughts so boldly but the firs thing that came to mind when I saw this was “That is effin genious!” lol. I’m going to posting adds on freecycle looking for pampers boxes lol. Thanks!
Just think of all the money saved by not using those expensive store ones and they are soooooo much cuter!!! Thank you for sharing!!!
Now I just need to find someone with diaper boxes!
bee blessed
mary
LOVE this idea! Just gave you a little shout out on our fb 🙂
I have had Huggies boxes in my bathroom for over a year now. I was going to Mod Podge them with paper, but I knew it wouldn’t last. Now canvas I love. Thank you for finishing my thought!
Don’t have diaper boxes anymore (my baby is 16) but I do get printer paper boxes! Do you know where you got the fabric for lining the boxes? It would go perfect in my office!
Terri
Planned to a T Events
Love it! Will definitely be making these.
Absolutely ADORE! Love diaper box re-dos and your rocks! So classy and lovin’ the numbers.
~Nike
[email protected]
How creative and elegant. I would have never thought of this!!! Thanks for sharing!!!
Genius!
Sigh…this is AMAZING. Thanks for sharing!!!
Wonderful idea! I can’t wait to try this. Thanks for sharing!
I LOVE THIS!!!! I too have an abundance of diaper and wipe boxes!!! Thank you!
They look fabulous!!! Now if I only sewed…. 🙂 – Karen
My first thought was, “oh no she di’int”. I have to tell you, if you never post anything this great ever again, know that you have inspired moms everywhere who have been breaking down and recycling those boxes for many years. Ah, I suppose one could start a blog solely on the multitude of repurposing diaper boxes…My son’s closet alone has one in use as a laundry bin, one for clothes that don’t fit in anymore to donate, one for clothes too big to put in the dresser yet. Gah! I have so much miscellaneous fabric just lying around this could get interesting!
Saw this on Money Saving Mom and these are AMAZING!! Thanks so much for sharing a great way to reuse really any type of box to get some stylish storage!
Just love this idea. I have tons of these boxes. I use the flaps for mini fabric bolts. i just wrap my fabric around them. Great way to display your fabric
Michelle
i love this idea! i posted a link to your great blog over on my blog page. girl, you are rockin’ in the crafts!!! your ideas are awesome!!!
kim
What a genius idea!!! I have been looking for some bins and haven’t been able to find any I liked. Now I can make my own. Thank you so much for sharing:) ~Angi
Love them!
Wow! I saw this on Money Saving Mom and absolutely love this idea!! I will definitely need to give this a try. 🙂 Thank you!!!
How amazing! I am brand new to your blog, and I found it through Not JUST A Housewife!
I love these containers! I am brand new to crafting, and I don’t sew at all, so I will have to make some adjustments, but I am excited to see what I can turn a diaper box into!! Thank you for the idea!!
Tiffani
thoughtsfromtiffani.blogspot.com
I would love it if you could follow my blog and give me some tips on my crafts! I would love to become a better crafter!
Love this idea!!! I need to make three for my laundry room! Thank you for sharing this…gonna share it with my fb friends as well!
I’m using nappy boxes for storage in all sorts of places in my house. Thanks for the ideas to pretty them up!
I just found your blog. in love. I am hyped to find this tutorial…I need to make these pronto!!!
Thanks for allowing me to share this cool project on my site Amy!
http://www.savingformickey.com
I adore these! I am linking to you from my blog tomorrow. Love them!
http://www.mycreativeescapes.blogspot.com
WOW! Great idea! I would love for you to link up any of your projects to my Ten Buck Tuesday link parties.
I’m a new follower 🙂
http://www.youngnester.blogspot.com
I have been looking for a tutorial for this for ages. I’m in love with your blog now. I posted a link to this tutorial on http://www.simplemomsolutions.com
THANK YOU THANK YOU!
WOWZERS! This is amazing….I just showed it to my husband and he was like, “NO, you have way too many projects!” But really, can a girl have too many projects? This is soo awesome
Halsey
Awesome re-purposing idea and amazing result — beautiful AND useful! Thanks so much for sharing!!
Great Idea! I saw this post the other day, and today decided to make a temporary fix to hide away some clutter, by wrapping Pull-Ups boxes with brown paper. I love the look and use so much, I’m going to go get some canvas or material to make them into canvas bins (or I might just use some other fabric). They are on an out-of the way shelf in the living room, so I just want it to look kinda nice, not ADORABLE like yours! I think I’m going to skip the inside lining too, for simplicity, and maybe just put a trim at the top.
Thanks for the easy tutorial!
Love this idea. I’ve done it with paper/scrapbook paper, but canvas lined would last much longer (and look nicer). And diaper boxes, oh do I have a collection always sitting in the garage ready to be broken down recycled. Instead I could save and repurpose them and save me a pretty penny on my next toy organizing solution (vs. Target’s ITSO system boxes at $10 a pop).
So I am featuring your little lovelies on my blog tomorrow. I can’t stop staring at them…so gorgeous! Stop by and grab a button.
Halsey
Hi! I loved this idea so much that I featured it today on The Weekend Review party at Humble Homemaking. Check it out on the link below and feel free to grab a featured button for your blog! I hope you have a wonderful day. 🙂
http://humblehomemaking.blogspot.com/2011/02/weekend-review-weekend-linky-party.html
How funny. I have 2 wipes boxes and 2 diaper boxes that I have been saving to do something similar with. All of my craft supplies are still packed away somewhere in a mess of boxes, so it may be a while. Thank you for sharing. Be sure to add them Monday to the More The Merrier Link Party.
http://diyhshp.blogspot.com/
I love this! We are moving and I am looking for some lovely, great ideas that are affordable. Your blog is perfect! I love it! Thank you for sharing this idea, I found you on my good friends blog: Spunky Junky 🙂 New follower!
-Marci
I love these so much I featured them on my blog. Thank you so much for the great tutorial.
This comment has been removed by the author.
Love this idea and shared it in my Finding Beauty Post with my blog sisters this week- hope you don’t mind
bee blessed
mary
Thanks for all your creativity!
Hey Amy! I just made these of my own and I blogged about it linking back to you!! Thanks for the tutorial! I LOVE IT!!
These storage boxes are absolutely beautiful! I am going to book mark and use this idea later!
These would make great gifts. Also, what a great way to recycle!
http://www.momssuccessfulbiz.com
Your boxes are beautiful!!! I’m glad to know I’m not the only one that saves all those diaper boxes 🙂
Such a fantastic idea and gorgeous to boot! I’m sharing these on my blog tomorrow 2/24.
http://www.wmcraftgoodies.blogspot.com
I’d also like to invite you to link up any of your amazing ideas to my linky party held every Friday-
Thanks again for sharing-
Wendy
I don’t have kids lol, but I’m so wanting to stock up on diapers for my future kids so I can have these boxes!
http://www.southerwhim.blogspot.com
I spent the entire night updating boxes for my pantry and i have to tell you what a great way to recycle and update ANY space for cheap! I went from store to store looking for inexpensive and stylish bins to organize my pantry and the nicer the more expensive!!! So i went to hobby lobby purchased 20 dollars worth or modern fabric and now i have 8 different size bins in my pantry! thank you! 😉
Amy,
I love this idea and with a 6 months old I’ve got lots of boxes to use. I posted it up to my blog at the following link
http://craftymommaof2.blogspot.com/2011/02/canvas-bins-from-diaper-boxes.html
I did a little feature for these on my blog: http://adiamondinthestuff.blogspot.com/2011/02/burlap-bins-kitchen-storage.html
Thanks for the inspiration! I’m a new follower!
Hi, I’m featuring this post today on my blog 🙂
Angie
http://create-it-fab.blogspot.com/
I’m so glad I found you!!!!
I love your ideas!
This diaper box craft makes me positively giddy!!
Great tutorial and gorgeous boxes! Linking to this post in my second “Walk around Blog Land.”
YOU are a Genius!!!
This is such a cute idea, if you don’t mind I will definitely be sharing it on my blog, and giving all the credit where it is due of course! I always have diaper boxes kicking around, now I am going to put them to good use:)
I would also like to add your site to m+
y blogroll if that is okay with you:)
Great craft! Fantastic idea it is!
Buy WoW Account
Wow! That is amazing! What an awesome transformation and idea! I love it! I think I will have to give that a try soon!
What a fabulous idea!!! As a mother of twins, I go through SO many diaper boxes! Thanks for the tutorial! Also, I’m a new follower! Check out my brand new blog vixenmade.blogspot.com
I commented before when you first did this but I still love it so much! This is a FANTASTIC project. Great idea! I would be delighted if you would link this to my VIP party today! http://designergarden.blogspot.com/2011/03/vip-party-6.html
Cheers!
Sommer
I heart these!! 🙂 Thanks for auditioning for OMTWI! 🙂
this is awesome!! i have never been so excited to buy diapers 🙂 i gave some link love on my page blmcraftsandcreations.blogspot.com. Hope you don’t mind!
Hi There!
Congrats on the new baby news! I saw your Lined bin box tutorial and knew I just had to make one. There are some things you keep atthe back of your mind telling yourself you will make it one day. And then there are those things that you just need to make-right then and there. Your bin box was one of them. I wend shopping for burlap (I wanted to use burlap instead of canvas) but did not come across any. Then I saw this rexine in a lovely yellow colour and I kne I had to make it from that. I both glued and sewed it onto the box using DMC thread and holes punched in using a punch needle. And used the second tutorial to make a liner. All came out great except that my son aged 19months likes it so much he tries to get into the box and sit inside!
Thanks for a great idea!
Dhilma ([email protected])
Found this tutorial from Ucreate…what a GREAT idea! I’ve been storing my son’s outgrown clothes in diaper boxes, but if I covered them with fabric and put labels on them, they’d look so much better! I’m going to have to start eyeing the sales for some heavy fabric….thanks so much for sharing!
great project!
Not sure if this has been mentioned or not but canvas drop cloths purchased at the hardware store is usually cheaper than yardage and a perfect use for something like this!
I linked you in to my post today. Thanks for the inspiration.
http://mygirlsmom2.blogspot.com/2011/04/spring-tweaking.html
I’m a sucker for anything you can make out of a cardboard box! 🙂 Love it. They look store-bought!
http://www.andreasteed.com/node/377
http://www.andreasteed.com/node/529
http://www.andreasteed.com/node/79
http://www.andreasteed.com/node/116
Great way to Go Green! Love this recycled project. Must try this soon! 🙂
Hi Amy,
Just wanted to pop over and let you know I shared your tutorial on my blog today, Here’s a link if you’d like to take a peek:
http://www.craftymumma.com/2011/06/tutorial-tuesday-lined-fabric-boxes.html
Gab xx
Your idea have inspired me so much and I have pretty much stopped throwing these free storage goodness…I just posted a new post about how I used this idea on my blog.
Thanks for sharing this wonderful idea.
http://nothingbetterthancrafting.blogspot.com/2011/06/diaper-boxes-did-not-look-better-than.html
I gave this a try a few weeks ago….I cut a lot of corners so mine did not come out as awesome as yours, but they still did the trick. Thanks for the tip about the canvas dropcloth…I still have tons of it left so I’ll probably make even more of these bins. :o)
http://prettyladydesigns.blogspot.com/2011/06/diaper-box-storage-bins.html
I absolutely love this! I have boxes galore, though not so much diaper boxes 🙂
I’m a new follower, and you are now at 2500!
Ours+His+Mine=Nine!“
Oh my gosh, I just found these on Pinterest and I LOVE LOVE them! What a great idea for all of those diaper boxes!!
I made something similar to these awhile back too! Fun to see a new method! http://bellesbazaar-heather.blogspot.com/2011/01/diaper-boxes-turned-storage-boxes.html
Oh sure what a lovely projects it is … totall amazing… so perfect with a practical approach… you done it so beautifully Thanks a lot for sharing…
http://craftaworld.blogspot.com/
Love
Farah
I Love what you created! I came across your post in a search I did weeks ago and have been thinking about you ever since. So glad found you again! I am now a follower! Yay! Hope you stop by and say hi sometime!
Doo-wa-diddy-diddy-dum…I am SO gonna make these! I could make hundreds of them!! Thanks for sharing 😉 *swak*
New follower here. Wow I love this idea. I can’t wait til we have some diaper boxes. 🙂
xoxo
http://dropsofmotherhood.blogspot.com
I love this idea. I just have one question. Is there a reason you used spray adhesive on the long sides and liquid glue on the short side? Instead of spray adhesive on the whole thing?
Hi, Mary! I did it that way, just because I knew the corner seams needed to be the strongest, and I wasn’t confident that the spray adhesive would be strong enough. Thanks for reading!
Saw this on pinterest and HOLY COW!!! That’s amazing!!!
They look gorgeous!
Thanks for sharing!
I know i’m not the only one to say this even just today or in the last hour or anything….but I found this on Pinterest….and I can’t believe I didn’t think of this sooner…YOU JUST MADE MY WHOLE WEEK!! =)
You.Are.A.Genius! Pinning this one!(I currently have 2 boxes in my possession!)
Genius!! And generous for sharing your idea! Yours turned out so well. 🙂
Just wondering how much supplies cost.
After seeing this post, I am SOO following you! Keep it up!
These are the prettiest DIY baskets I’ve ever seen! great job chica!!!! <3 I love the bows and numbering as a great little touch to set them apart!
xoxo
jenn
TOTALLY FABULOUS!! I am so doing this rather then baskets for my craft room! RFS!
I’m already sad that I have no more babies or diapers….now I’m even sadder, I need these boxes!!!!
wicker storage baskets
I never comment on posts like this, but I had to tell you this is BRILLIANT!!!! Thank you for sharing!
I’m new to doing crafts, but this looks easy enough to try. Can you help with step 1 though…I’m not understanding how to take the measurements. Sorry! This will be my first craft 🙂 thank u for your help!
This comment has been removed by the author.
I absolutely love this tutorial and can’t wait to try it out with all the boxes I have saved just for this project. I shared your link on our page today for suggestions on how to Create and Store Toy Stations for Babies and Toddlers. Hope you get a chance to check it out. http://theeducatorsspinonit.blogspot.com/2012/02/baby-time-ideas-for-creating-and.html
The positive side of having to deal with pampers! I’m definitely going to try it..I just wish I didn’t throw that box away just this morning!
I am so glad I saw this (I read about it on Jen’s IHO blog). Great idea!
I am in love with this idea. I was actually thinking about reusing our pile of diaper boxes this week, and I’m glad I ran into this post because I know it’ll work great!
Thank you so much !!! This is wonderful, I have been creating boxes for several weeks now (instead of recycling them at work, I bring them home) and using up some fabric stash. I love it !!!!
Hey Positively Splendid! I’m the Social Media Coordinator for Hobby Lobby! I just wanted to let you know we loved this idea so much we pinned it to our Upcycling board on Pinterest! Here’s the link! http://pinterest.com/pin/85568461640294674/ Also, we posted this project on our Facebook page! Here’s the link to that as well! http://ow.ly/amQ8e Have a wonderful day!
Gorgeous boxes! Love your ideas!
These are BEAUTIFUL! Thank you so much for sharing 🙂
I tried it and they turned out great! I’ve posted about it on my blog http://dillydallydoodles.blogspot.com/2012/05/home-storage-baskets-out-of-boxes.html
Thanks for sharing!
Those diaper boxes don’t really look like containers for diapers after the makeover! Thanks for this interesting idea, and for sure those who went over this page can come with more ideas out of the same moving boxes cheap .
This tutorial was good for my soul Thank you so much!
Knowing the items that you often need from the ones that you can already keep in storage is important so that you will know where to place them. With the help of boxes and other storage Tulsa OK solutions (for instance) , your home or workplace will be clutter-free and you no longer have to worry about misplacing any of them.
do you remember how much fabric you started out before cutting it for the surrounding the box?
Tiffany, it was approximately 3/4 yard. The amount will vary depending upon the size of your box. I hope this helps!
Tiffany, it was approximately 3/4 yard. The amount will vary depending upon the size of your box. I hope this helps!
Hi Amy :-]
I have been Pinning your stuff for awhile now {hope you don’t mind!} and I absolutely love this idea/tutorial.
When I moved from Iowa to Missouri in March, I had packed up a lot of my daughter’s things in her old diaper boxes and then when I unpacked them I broke them down and stored them figuring that I’d find a use for them eventually. Now I have, thanks to you. :-]
Keep up the good work! I absolutely love reading your blog :-]
Its just amazing.. love the contrast between the canvas and the cloth.. Lovely idea.. Have to try it out!!!
This is just amazing! Not only did you come up with beautiful canvas bins but you also contributed to the mission of saving the Earth. This idea of yours will certainly inspire others to do the same or create other useful things from recycled materials. Thank you for sharing this post.
I’m no beginner to crafting and upcycling/repurposing items (old or new) around the house, and i love your idea of turning diaper boxes into storage bins. My only issue is your steps are bumched together with very little pictures for each and every step provided. Unless its a planned out video fm step 1 to the end, can you provide more pictures of each and every step you did (minus the repeated steps)? Its greatly appreciately for a cool project. Thanks
Hi, Cindy! The photos in the original tutorial are all I took of the process. I think you’ll find that along with the detailed step-by-step written instructions, I’ve provided a comprehensive tutorial for how this project is completed. Thanks for stopping in!
These are a fantastic idea, love the ones you did for the nursery!
Thanks so much, Jen!
This would also work great with computer paper boxes- those great lidded boxes that we just throw in the recycling bin at work! I have tons of them at home storing this and that and they need some gussying up, thanks!
Computer boxes would be perfect! Thanks for the tip.
I am wondering if you have an idea for lids for these boxes, then they could be stacked.
With a two-year old still in diapers, I have lots of these boxes laying around. I just have not wanted to throw them away because I know I can use them for something. Now that I just got my first sewing machine, I am less afraid of fabric, and I will try this out! Thanks!
I am thrilled to discover the directions for covering these boxes. No, I don’t have diaper boxes, but I do have some very sturdy ones for purchasing coffee for my Keurig at a big box store. Thanks!
Hi, great tutorial. I was wondering where you purchased the heavy canvas fabric? Any idea on price per yard?
Thanks!
Hi, Jane! I found my canvas at Hobby Lobby, but since I wrote this tutorial, I have discovered that canvas drop cloths available at places like Lowe’s and Home Depot work perfectly, and they are much cheaper per yard.
I love this! I’ve been looking for containers for my granddaughter’s room….she has soooo much stuff…I will be making these…thanks for sharing….
Terrific, Renee! So glad you found this tutorial helpful.
Love these! Thanks for the tutorial!