In case you weren’t around for this post from earlier this week about the sweet little party I put together for my daughter’s third birthday, head over there to check out the full spread.
As I mentioned in that post, I rarely put a party together that doesn’t entail some goodies from Lettering Delights. I find their themes to be impressively comprehensive, with things ranging from elegant to fun to everything in between. I was so excited when I first started planning this party to see that one of their newest releases pertained to summertime treats, which couldn’t have been better for a party whose focus was a visit from the ice cream truck! I could easily have found countless ways to use any number of the cute items available, but because I was trying to practice some semblance of restraint, I limited myself to the following purchases:
Summer Popsicles and Treats Graphic Set
Summer Popsicles Alphabet
Summer Treats Paper Pack
Today, I’m going to share with you just how I used these elements to doll up Charlotte’s party!
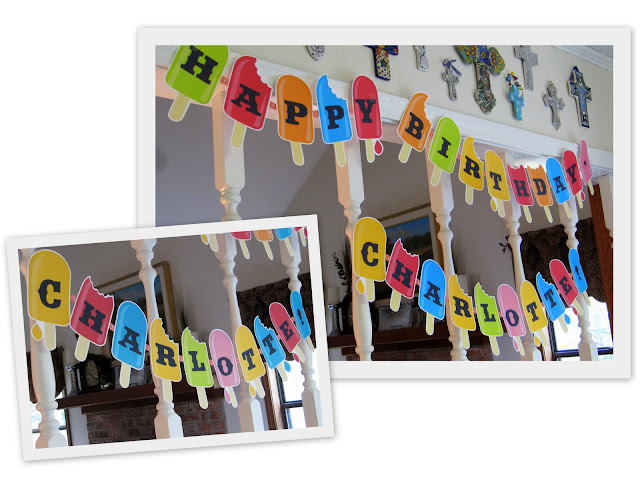
The moment I saw the Summer Popsicles Alphabet Set, I knew it would be parfait for a fun birthday garland to hang over the food table.
For this project, you will need:
Summer Popsicles Alphabet Set
White Card Stock
Word Processing Software
Scissors
Decorative Cardstock (I used pink), trimmed down to .5″x4.5″ strips
Adhesive Runner
Small Brads
To start, print off the popsicle graphics with your desired sentiment onto your white card stock using your word processing software. I sized mine to a height of 9 inches to be able to print them off two to a sheet.
This method for making perfectly coordinated party hats was so simple, I know I will be using it for many events to come! I found the free template I’ve linked below through Scholastic.
For this project, you will need:
Summer Treats Paper Pack
Summer Popsicles and Treats Graphic Set
Party Hat Template
White Card Stock
Scissors
Double-Sided Tape
Clear Scotch Tape
Elastic Thread
Rick-Rack
Hot Glue
Dimensional Foam Adhesive Dots
To embellish my hats, I hot-glued rick-rack to the bottom of each. I then printed out two different ice cream graphics onto card stock, cut them out, and adhered them to the front of my hats with dimensional foam adhesive dots.
I hope y’all are inspired by the fact that for a small monetary investment and just a bit of time, it is possible to create custom party decorations to coordinate perfectly with any party theme!


Having grown up in a home brimming with sewing notions and paintbrushes, Amy has a deep love for all things creative. On any given day, you’ll find her knee-deep in her latest creative endeavor, with projects ranging from sewing and crafts to home decor and kid-friendly ideas. Amy believes that everyone, regardless of skill level or experience, possesses the ability to create something beautiful, and Positively Splendid was born of her passion for helping others harness their innate creative potential.


Thanks for sharing! This makes me want to celebrate something 😉
Thanks Amy for a great tutorial. Do you use photoshop? Your party is just delightful!
The next time I’m going to have a birthday party for one of my kids, I’m going to make party garlands and hats with my hands, just like yours, Amy! Thank you for sharing this tutorial!