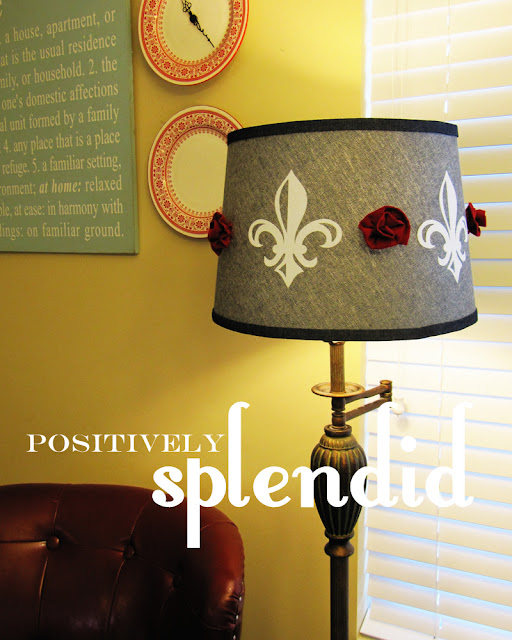
Before we begin, head over to check out my post from yesterday for how to create Simple Ruffled Rosettes. Be sure to hurry back, though, so we can get started putting them to good use to give new life to an old lamp!
I am in the process of creating a new sitting room/office in our front room. The space is actually intended to be a dining room, but with our bonus area having been converted to a nursery for the new baby, we had to rethink things around here a little. 😉 Because this room is the first thing you see when you walk in the house, it needs to be both attractive and functional. I know it’s going to be a bit of a challenge to achieve that balance, but I am having fun giving it a shot!
My number one goal with this room is to minimize the amount of items I have to purchase in order to achieve the look I’m wanting. Today, I’m reviving a floor lamp purchased from Walmart eons ago to sit next to the red leather occasional chair I purchased last weekend. (Which, incidentally, is my only splurge for the space. Can I get a raise of hands for anyone who loves a clearance find at Home Goods?)
Ready to see how I put this shade together? Let’s get started!
For this project, you will need…
A self-adhesive drum lampshade (I purchased mine at half off from Joann)
Denim
Rotary cutter and mat
Bias tape maker
Iron
Washable ink marker
Prepared Ruffled Rosettes
Hot glue (or a different fabric-ready adhesive, such as E6000, if you are worried about lumpiness)
step 1 / Cut 2 strips of fabric that are 1-inch wide by the length of your fabric. Run these through your bias tape maker, according to the maker’s instructions. (Here is a great tutorial explaining how to use a bias tape maker.) Note: It isn’t necessary that your strips be cut on the bias for this. When you are finished, make sure that you have a folded strip long enough to go around both the top and bottom of your shade. If you need to add length to your piece in order to go around, cut another 1-inch strip of fabric and stitch it to the unfolded end of one of your main pieces, then run it through your bias tape maker to fold.
step 2 / Use the template provided with your lampshade to cut out your main fabric piece to cover your shade. Fold the piece in half lengthwise, and mark the center top and bottom with a washable ink marker. Use your Silhouette to cut out you fleur de lis designs (I purchased mine from the Silhouette online store – 3 designs for 99 cents). The size you cut your designs will vary depending upon the size of lampshade you are working with. To go around my lampshade, I needed a total of 5 fleur de lis that were each 5 x 4.5″. Starting at the center mark you made earlier, adhere your first fleur de lis to your lampshade by ironing it into place according to the heat transfer package instructions. Repeat until all of your fleur de lis are adhered to your fabric, spacing them an equal distance from one another as you go.
step 3 / Adhere your embellished fabric piece to your lampshade, making sure all of the edges are nice and lined up. Where the short edges of your piece overlap, fold under the top edge by 1/4″ and then secure it with a line of glue so your finished look is nice and tidy. Starting at the back seam of your shade, use glue to adhere your bias tape pieces to the top and bottom edges of your shade to conceal the raw edges of your main fabric piece. Fold under the edge of your bias strips where the edges overlap and secure with glue, just as you did with your main fabric piece before. Now, adhere your finished rosettes to your shade in between each of your fleur de lis designs.

Having grown up in a home brimming with sewing notions and paintbrushes, Amy has a deep love for all things creative. On any given day, you’ll find her knee-deep in her latest creative endeavor, with projects ranging from sewing and crafts to home decor and kid-friendly ideas. Amy believes that everyone, regardless of skill level or experience, possesses the ability to create something beautiful, and Positively Splendid was born of her passion for helping others harness their innate creative potential.


Oooo! great idea! now if only I had a silhouette!
I love the rosettes!
love your lamp shade! awesome idea to use denim. i have a ton of denim i like to recycle!
These are gorgeous! Thanks for the tutorial!!!
That came out beautiful.
Your lampshade is so pretty.
Another silhouette project to add to my list!