Today’s Swell Noël post features a darling Christmas craft idea from Bonnie and Trish at Uncommon Designs. These little angels would be perfect as centerpieces, or even tree toppers! New to the series? Catch up on all of the projects from the series by visiting the photo guide of all of the ideas shared by the talented Swell Noël contributors, and follow along as things happen on Twitter, Facebook, Google+, Pinterest and Instagram by using the hashtag #SwellNoel.
Hi Positively Splendid readers! We are excited to be here today as part of the Swell Noel series. We are Trish and Bonnie, and we blog over at Uncommon Designs. Amy has been one of our favorites since we started blogging and we are so happy to be here today and to show you our sweet Christmas Angel…
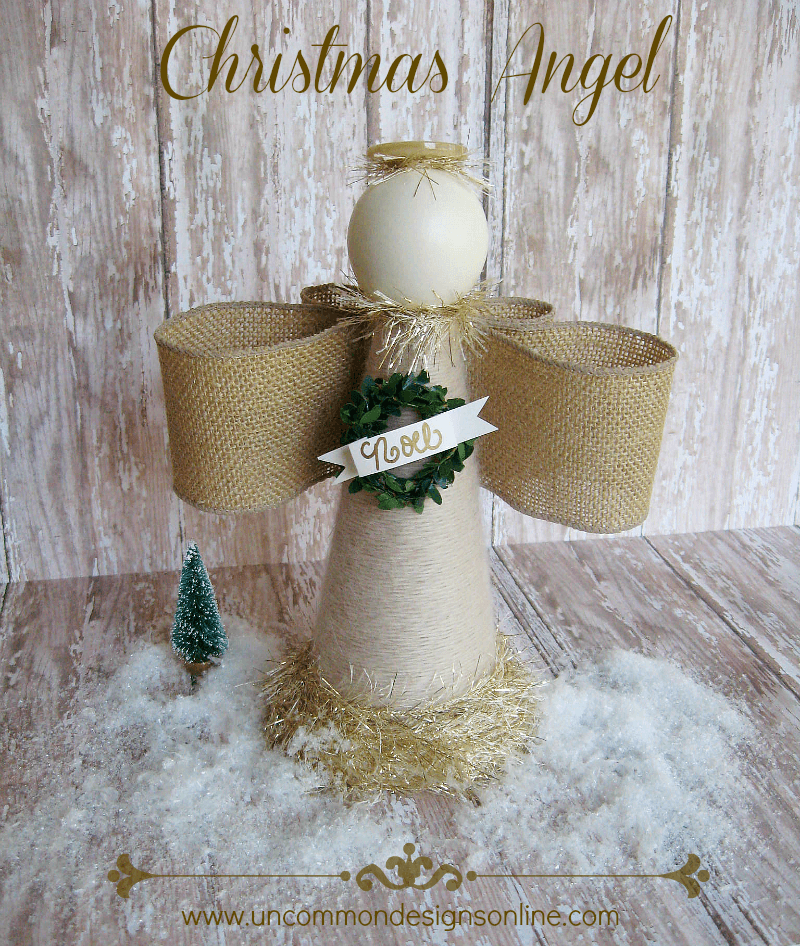
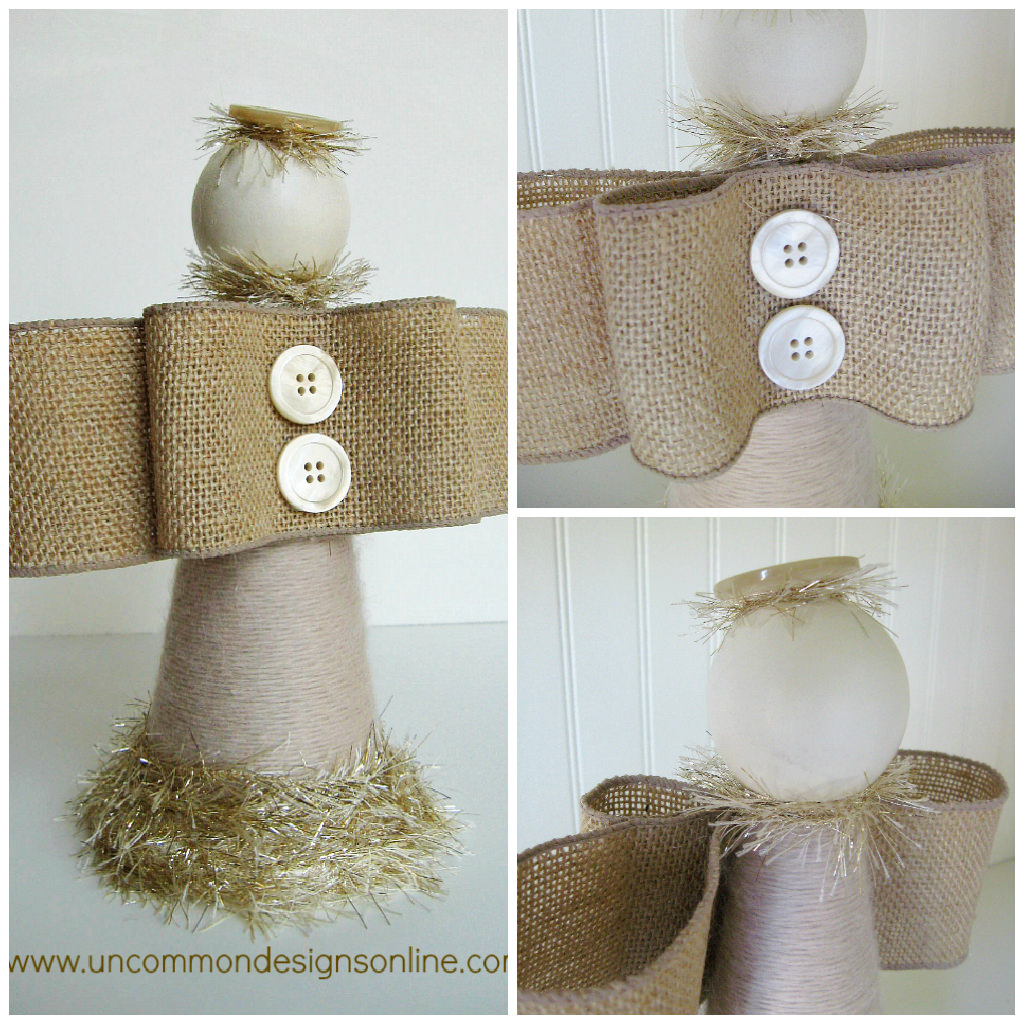
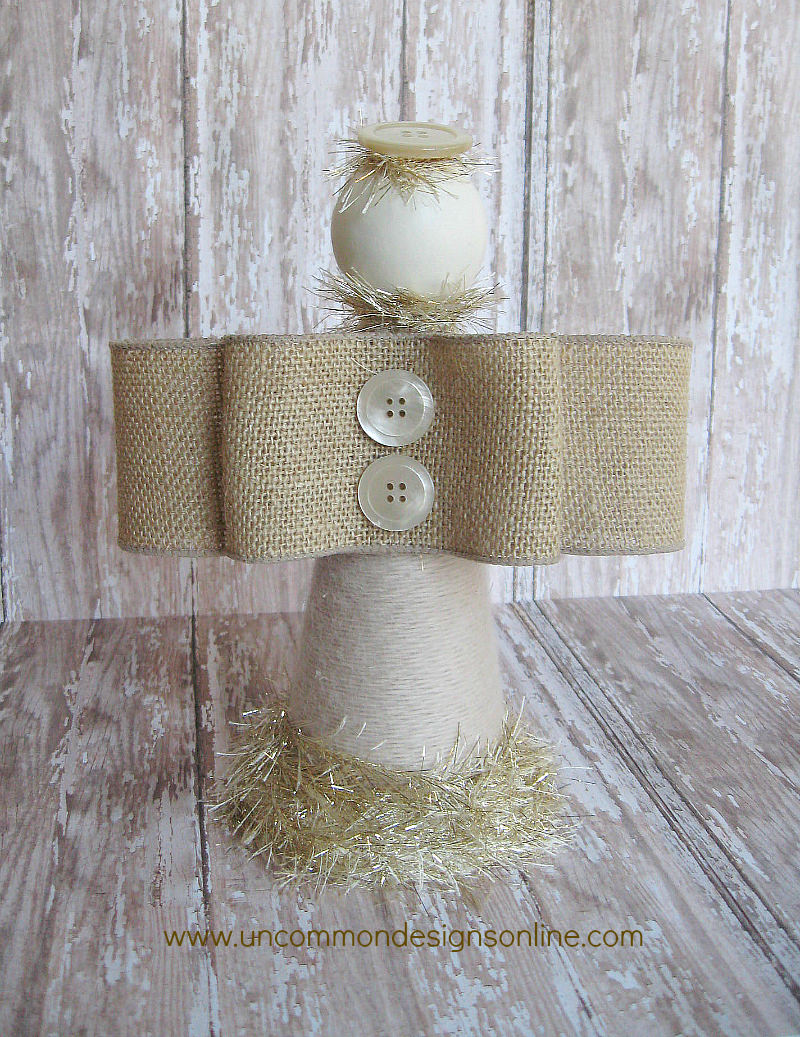
Isn’t she adorable! We love the neutral tones and textures. We are suckers for burlap, and those little burlap wings are just what we wanted for our little Christmas Angel!
So, let’s get started!
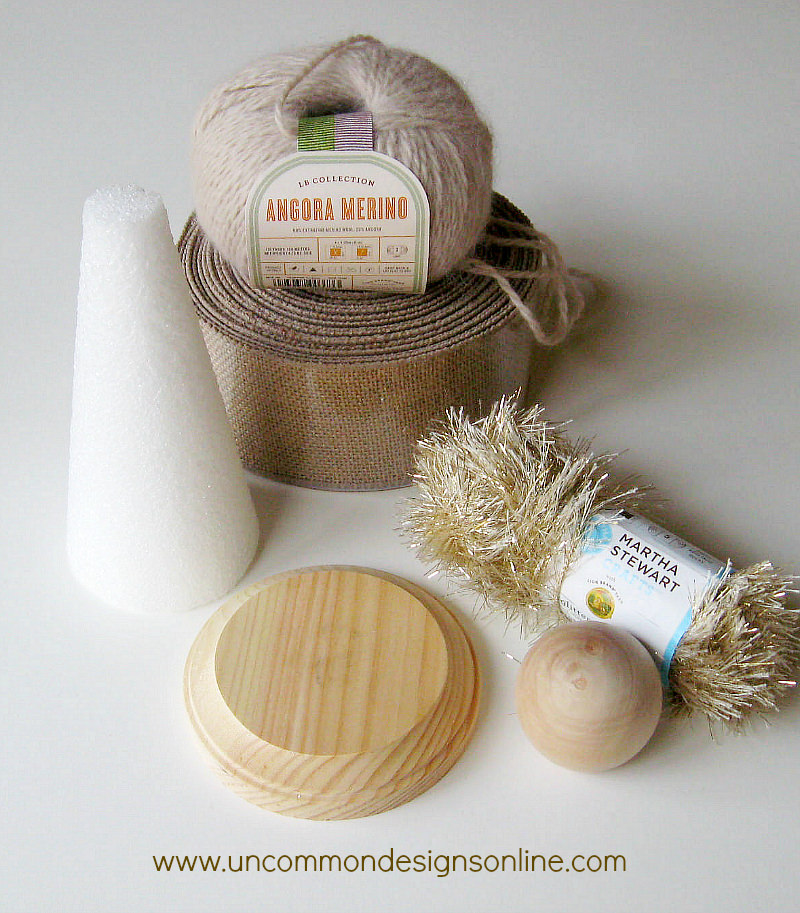
Here are the supplies you will need to create your own little Christmas Angel…
Cream Colored Yarn { I used Martha Stewart Angora Merino yarn }
Glittered Gold and Cream Eyelash Yarn { I used Martha Stewart Eyelash yarn }
Round, Wooden, Flat Bottomed Ball
Styrofoam Cone
Round Wooden Disc
Wired Burlap Ribbon
Cream Spray Paint { I used Rustoleum Heirloom White }
2 Medium Sized Cream Buttons and 1 Large Cream Button
Faux Mini Boxwood Garland { Consumer Crafts }
Gold Metallic Sharpie
Cream Cardstock
Hot Glue Gun and Gluesticks
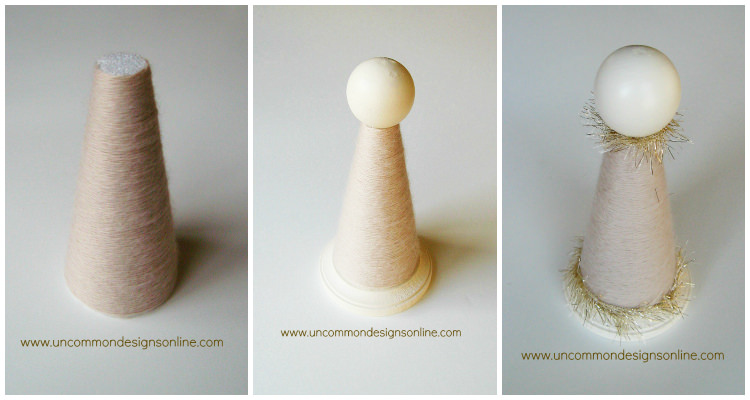
First, you will wrap the styrofoam cone with your cream yarn. We started at the top and worked down. Apply a little hot glue at the top to get started and then at the bottom to finish off. Spray paint the wooden disc and round wooden ball. Once they are completely dry, use your glue gun to attach the ball to the top of the styrofoam cone and the disc to the bottom of the cone. Next, wrap some of the eyelash yarn around the neck and around the bottom, attaching with a touch of glue from your glue gun.
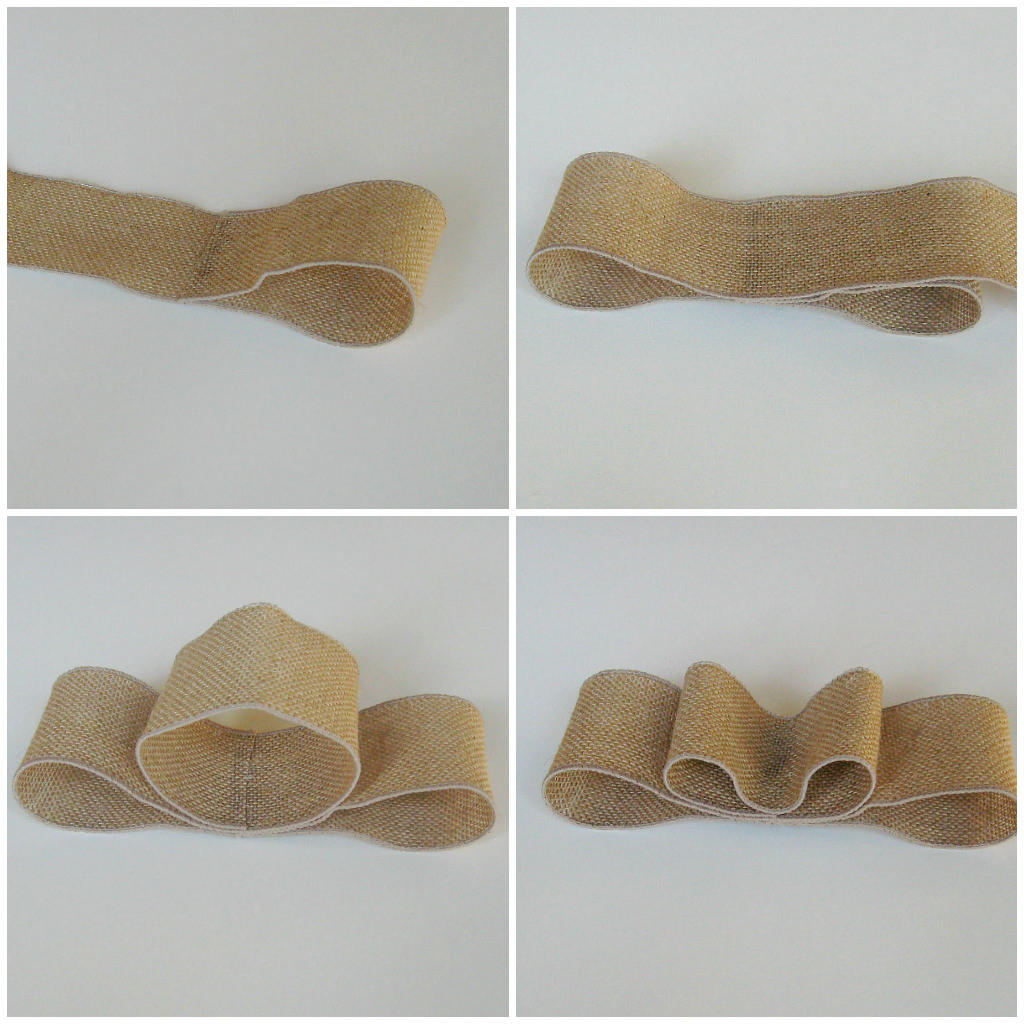
Next, let’s make the burlap bow for your Christmas Angel’s wings. Cut a piece of burlap wired ribbon. We simply estimated the length by the size wings we wanted. Fold over one end to the middle and glue down. Fold over the other side so that it is equal to the other loop and glue in place. Loop the end around to make a smaller loop in the center and glue in place. Finally, glue down the little loop in the center.
Now you will simply glue 2 of the cream buttons to the middle of the wings and then glue the wings to the back of the angel. We placed ours a little higher than halfway up on her back. The top of the burlap is about level with the top of the cone. Next, glue the larger cream button on her head as the halo. We placed it a little back on her head instead on directly on top. Once the button halo is dry, glue a little of the eyelash yarn around the button.
Here she is from the back all finished! I have her placed in my home where you can see the back as well, because it is just too cute to cover up! I love the little buttons!
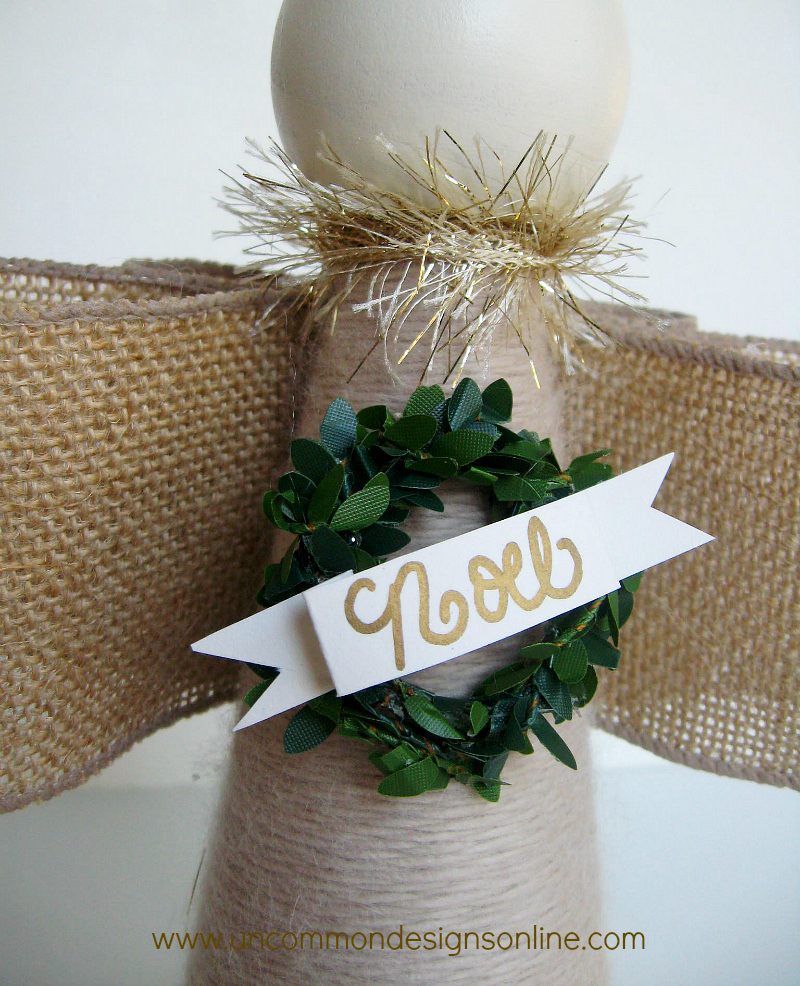
Finally, the last step is to make this sweet faux boxwood wreath and simple banner. We looped the mini boxwood garland around twice and twisted it closed. We then attached it to the angel with the glue gun. We made a quick little banner out of the cream card stock and free handed the word “NOEL” across it in gold. You really could do so many things to her to personalize your angel. She could be “holding” all kinds of things and you could change up the wording on the banner as well! I chose to not paint a face on her because I really wanted a simple look, but you could totally do a sweet little face with the sharpie!
I adore how our Christmas Angel turned out! We hope each of you is enjoying this holiday season with family and friends!
Thank you Amy, for having us as a part of this incredible Swell Noel series! We had so much fun!
We would love for you to stop by and visit us at Uncommon Designs. You can also find us on Twitter, Facebook, Pinterest, and Instagram.
Bonnie and Trish
Having grown up in a home brimming with sewing notions and paintbrushes, Amy has a deep love for all things creative. On any given day, you’ll find her knee-deep in her latest creative endeavor, with projects ranging from sewing and crafts to home decor and kid-friendly ideas. Amy believes that everyone, regardless of skill level or experience, possesses the ability to create something beautiful, and Positively Splendid was born of her passion for helping others harness their innate creative potential.

Thank you so much for having us today Amy!!
That’s so cute!! Love it!!
That is just the sweetest little thing! Wonderful tutorial and I love all the textures that are mixed in. It’s super cute!!