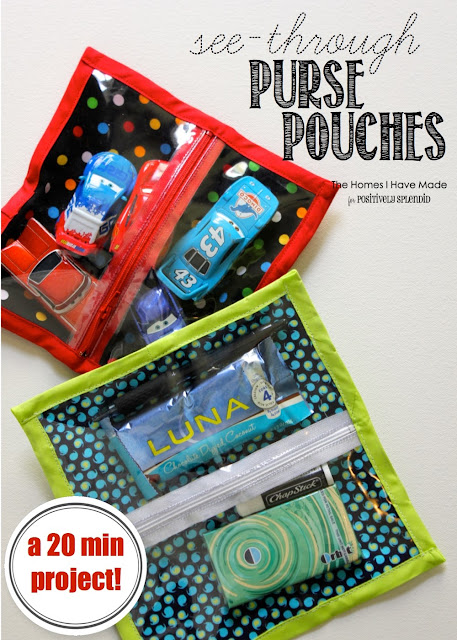
Here’s what you need to whip up your own pouches!
To make one:
- 1 or 2 coordinating fabric prints, enough to cut two 9″ squares (one from each print if you choose two fabrics)
- Coordinating thread (and a sewing machine, not pictured)
- A 7″ zipper
- Color coordinated double fold bias tape
- Clear vinyl, any gauge will do
- Heat-n-bond
- a) Iron your Heat’n’Bond (paper side up) onto the WRONG side of your other fabric.
- b) Remove the paper backing from the Heat’n’Bond.
- c) Iron your 9″ square of coordinating fabric (RIGHT side UP) onto the area that has the Heat’n’Bond.
Next, cut the vinyl into two rectangles, each measuring 4.5″x8″.
Now it’s time to install the zipper. Don’t panic – this is going to be a lot easier than you think!
- a) Pin the zipper (FACE DOWN) onto one edge of the vinyl (keep thinking: wrong sides together).
- b) Using a zipper foot, sew the vinyl to the zipper as close to the zipper teeth as you can get.
- c) Flip the zipper right-side-up and fold/bend the vinyl open, just like you would with a fabric seam.
Repeat the exact same steps on the other side of the zipper with the other vinyl rectangle. When you are done, it should look like this:
Now it’s time to bring your two squares together!
Other items I am constantly fishing out of my purse are cars for my Cars-loving two-year-old. We can’t go anywhere without one (or five!). To keep them corralled and at the ready, I made a special pouch to hold Lightening McQueen and his friends!
Having grown up in a home brimming with sewing notions and paintbrushes, Amy has a deep love for all things creative. On any given day, you’ll find her knee-deep in her latest creative endeavor, with projects ranging from sewing and crafts to home decor and kid-friendly ideas. Amy believes that everyone, regardless of skill level or experience, possesses the ability to create something beautiful, and Positively Splendid was born of her passion for helping others harness their innate creative potential.


Thanks for this tutorial. I am definitely going to make one for my purse, but I also need to make one for another reason. Hubby and I are planning on going to a pro football game this year, and the NFL has banned standard sized purses from all stadiums. A small clutch no larger than a person’s hand is OK. A large freezer bag passes, too. But anything else must be made of a clear material, such as plastic, and must not be larger than 12 x 6 x 12. I will be making one of these to take with me to the game!
Great tip, Sandy! These will work perfectly for that. Enjoy the game!!
So cute!! And so practical, too! I’ve scheduled a post on Craft Gossip for later this evening that links to your tutorial. When it goes live, you can see it here: http://sewing.craftgossip.com/tutorial-see-through-zippered-purse-pouch/2013/07/16/
–Anne
Thank you so much, Anne! I hope you are doing well. 🙂
It’s times like these I wish I could sew. I need these so badly! What a great idea, they are SO cute!
Amanda check with your nearest school, the students might like these and might make you one, if not e-mail me and I’ll make one for you.
Great zip bag. Do you have a pdf that I can save?
Ooh, I would love a pdf also! 😀
Cute and practical! It’ll be great for beach too.
These would be great in any size, especially when traveling through busy airport security checkpoints. It would have saved me so much frustration zipping and unzipping small bags in my luggage for the searches! Great instructions, BTW. One question?… I noticed you used NO-SEW adhesive, at least in the picture, did you find it gums up your needle at all?…I’ve always been scared to use it…even though it is usually the strongest!
Love this project. I am always looking for cute projects to make for gifts. One question, you used heat bond. I am trying to save money and use scraps, so it is really necessary? It is to give body to the pouch? Or just to put the 2 pieces of fabric together? Can I use interfacing scrap to add body and just sew around the 2 squares? Thanks
THIS IS A-MAZING! thank you so much for the step by step “tute” ..xox marie
very good project see-through zipper pouch, since my sewing studio is organized with see through items where everything can be seen, why not keep my purse organize too, thank u very much for a cute sewing idea.
Great idea!!!
I’m going to make mine a bit larger…say 12×12 and add a couple of “puckers/gathers” to each side…in order to make the inside have a bit more room…otherwise you can only fit flat items in these!
Can’t wait to try it!!
Melisa H.
I love this project. I think I’ll go work on one, but I was thinking of making it 2 sided, by putting a second sheet of plastic and zipper on the other side of the fabric. Thanks for the tutorial.