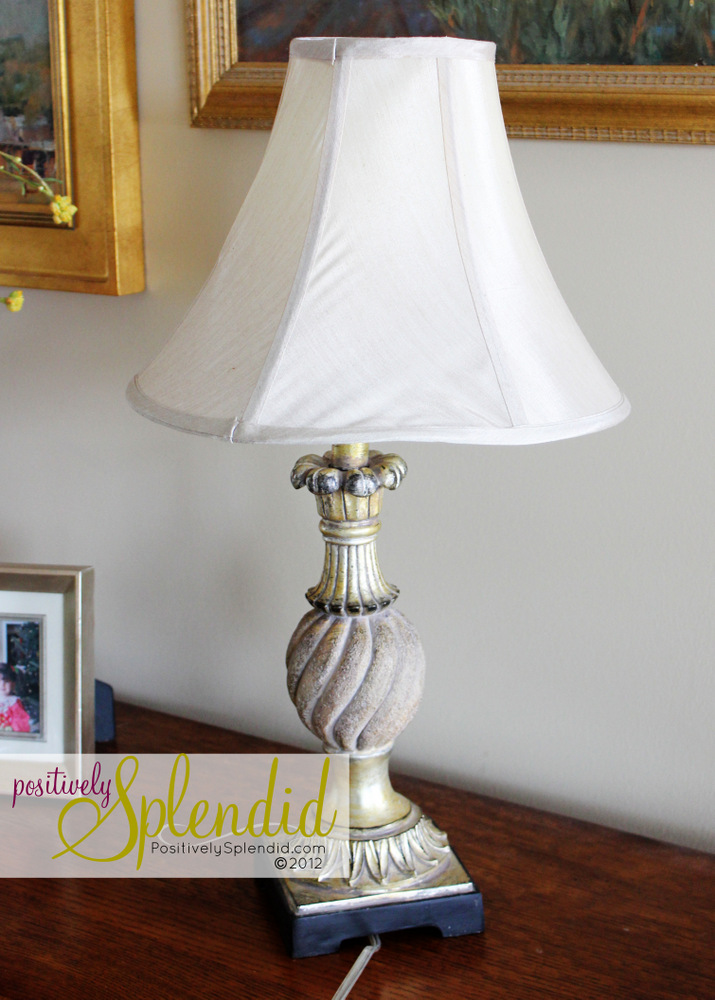
- An old lampshade
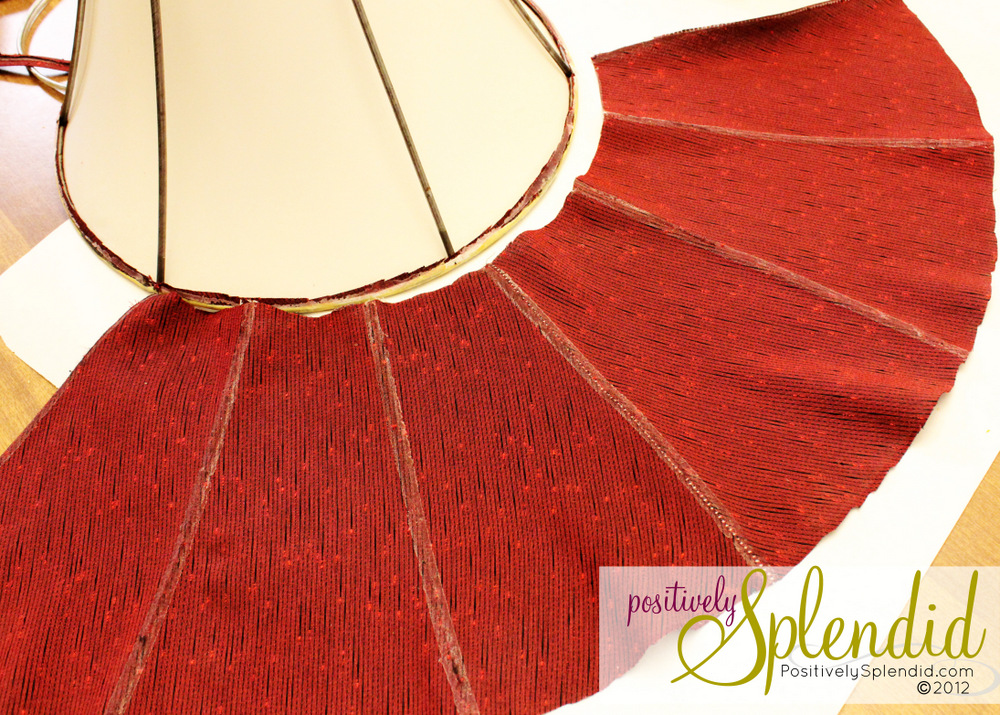
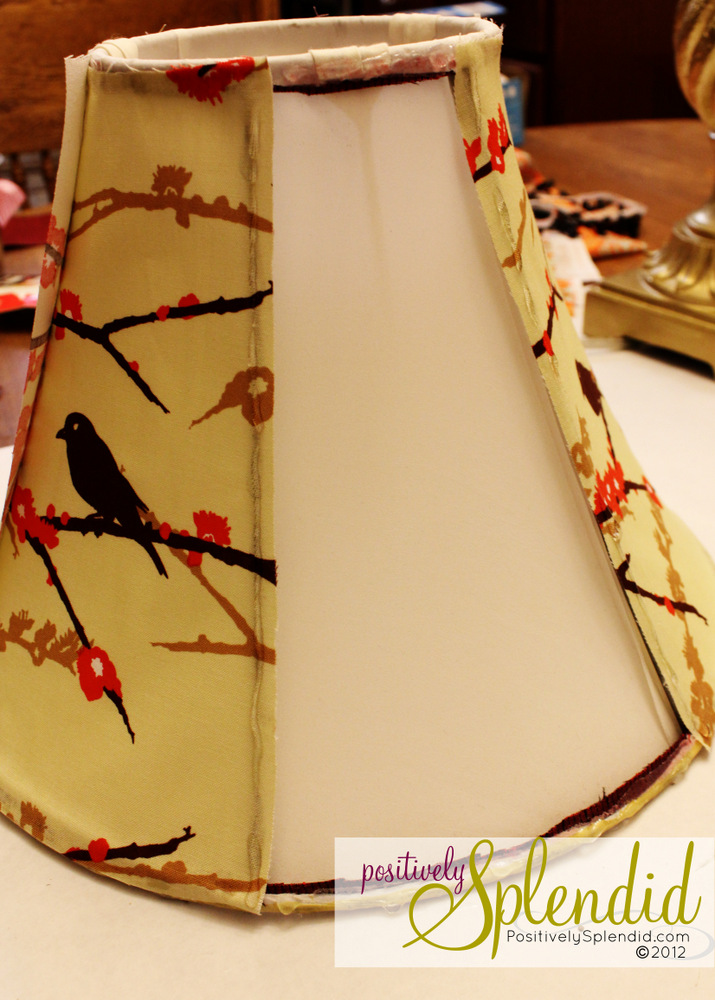
- Fabric
- E6000 adhesive
- Scissors
- Packaged double-fold bias tape (one package of three yards was more than enough for my smallish shade here)
- Other decorative trim (optional)


Having grown up in a home brimming with sewing notions and paintbrushes, Amy has a deep love for all things creative. On any given day, you’ll find her knee-deep in her latest creative endeavor, with projects ranging from sewing and crafts to home decor and kid-friendly ideas. Amy believes that everyone, regardless of skill level or experience, possesses the ability to create something beautiful, and Positively Splendid was born of her passion for helping others harness their innate creative potential.
I love your choice of fabric! It looks great!
So pretty! If my two year old hadn’t broken all the lamps in my house, I would totally do this! LOL
Jill @ Create.Craft.Love.
It looks SO much better! Cute.
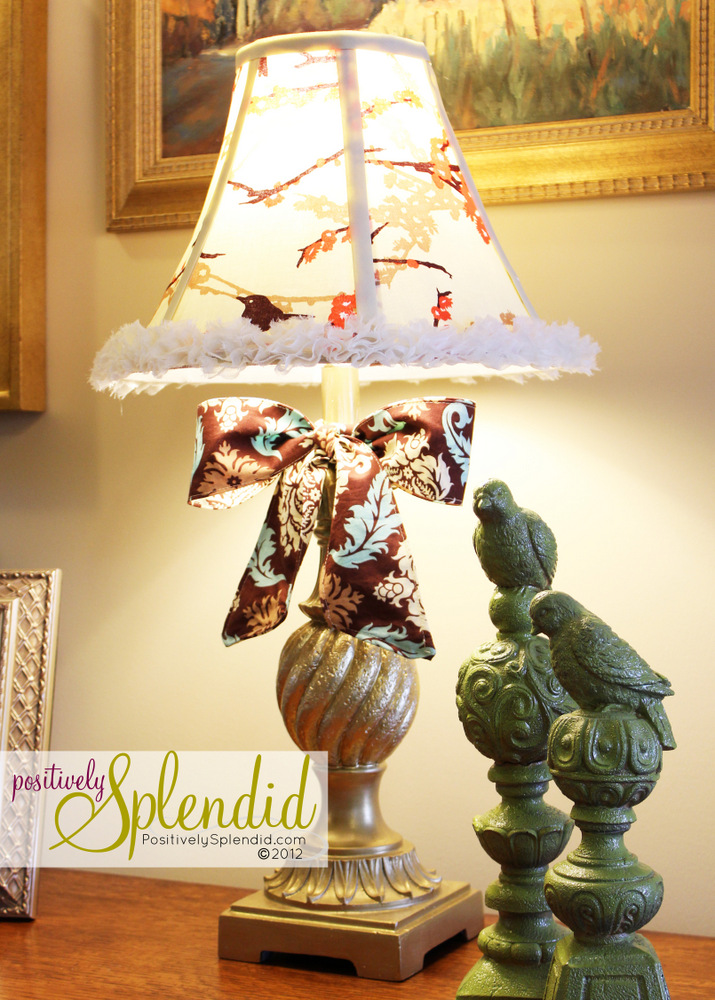
I hope I can be honest with you. I hate the bow. However, the lampshade itself is spectacular! Love it! (without the bow)
Great tutorial, Amy. I’ve always wondered how you would re-cover a shade with all of the separate panels. Love the cute trim!
I’ve never wanted to tackle a paneled lampshade, but now I totally think I could! Love how yours turned out, especially with that gorgeous trim on the bottom. So pretty!
Love your new lamp & appreciate the great tutorial!! Blessings!!
What a great project! Got me looking at all the lamps in my house to see which ones need a facelift!
Hope you had a blessed Mother’s Day, Amy ~ Heidi 🙂
Wow, that looks beautiful! Thanks for the tutorial! 🙂
That looks great! I’ve got a few old lamps around here that could stand to be refurbished.